Showing posts with label dinner. Show all posts

Tuesday, September 29, 2015

Lasagna Soup & Cheesy Garlic Bread

It's a nasty day at home. The weather can only be described as gross. It's misty raining and foggy. We are snuggled up on the couch and enjoying a super simple (but super delicious!) meal, created by things we had already in our pantry. I had seen some Lasagna Soup recipes on Pinterest while pretending I didn't need to clean the house on my afternoon off, so I decided to give it a try! And yes, I actually cooked tonight!

Lasagna Soup

Ingredients
Olive Oil
1 lb ground beef
Black Pepper
Red Pepper Flakes
3 cloves minced garlic
4 cup Low-Sodium Chicken Broth
1 (14.5 oz) Can Petite Diced Tomatoes
1 (14.5 oz) Can Crushed Tomatoes
2.5 Tbsp tomato paste
1 3/4 tsp basil
3/4 tsp oregano
1/2 tsp rosemary
1/2 tsp fennel seeds
1/2 tsp thyme
1 tsp sugar
1.5 Tbsp parsley (plus more for garnish)
8 lasagna noodles, broken into bite-sized pieces
1 1/4 cups shredded mozzarella cheese
1/2 cup shredded parmesan cheese
8 oz ricotta cheese

Directions:
1. Measure out basil, oregano, rosemary, fennel seeds, thyme, sugar, and parsley. Put together in a ramekin and set to the side.
2. Pour 1 Tbsp olive oil into a pan and warm on medium high heat. Crumble and brown beef. Add 2-3 large pinches black pepper and several pinches (to taste) of red pepper flakes. Once browned, pour beef out onto paper-towel lined serving platter or large bowl.
3. Add another 1 Tbsp olive oil into the pan. Toss in minced garlic and sauté for about 30 seconds.
4. Pour in chicken broth, diced tomatoes, crushed tomatoes, and tomato paste. Stir, making sure to scrape the bottom of the pot to get the delicious flavor from the beef off the bottom!
5. Pour in the pre-measured spices and ground beef. Bring to boil and then reduce the heat to low or medium-low. Allow soup to simmer, covered for 20 minutes.
6. Cook broken up lasagna noodles according to package.
7. Drain pasta once cooked and add into the soup mixture.
8. Mix together Ricotta, Parmesan, and Mozzarella cheese.
9. Serve up soup and place a heaping tablespoon of the cheese mixture on top. Sprinkle extra parsley on top! Enjoy with cheesy garlic bread (recipe below!)

Cheesy Garlic Bread

Ingredients:
Block/Wedge of Asiago Cheese
Sub Roll bread/French Bread/Any loaf bread you have at home
Garlic Powder

Directions:
1. Preheat oven to 375.
2. Shred a large amount of Asiago cheese (We had a wedge and I shredded the entire wedge).
3. Take a heaping Tablespoon of garlic powder and mix well with the cheese.
4. Slice bread in half lengthwise.
5. Lay bread out on baking sheet. Put 1/4 of cheesy garlic mix onto each slice.
6. Cook at 375 for 10-12 minutes until cheese is golden brown.

Tuesday, September 8, 2015

Labor Day Lunching

It's Labor Day weekend, which means cookouts, grilling, and beer. I'm fortunate enough to have married into a family that has an "in" in the BBQ world (If you're in or near Albertville, AL - check out Wilson's BBQ!). My Father-in-law owns a barbecue restaurant, so we get barbecue (and good barbecue at that!) for all of the appropriate holidays - Memorial Day, 4th of July, Labor Day. I love barbecue, but I get bored easily. That's when I get my "great ideas," which J then implements in the kitchen. This Labor Day, I got the idea to do a twist on the classic barbecue sandwich. It's sort of a combination of a melt and a barbecue sandwich (you look confused - bear with me!).  It ended up being one of the most delicious ways I have ever enjoyed barbecue (and we even had it at our wedding reception!). It's super easy, makes a quick meal, and is quite filling!

Ingredients:
Sweet Baby Ray's BBQ Sauce
Mayo
Cheddar Cheese
Romano Cheese
Barbecue (about 1/4 pound per person)
Coleslaw (premade or homemade will work!)
A stick of butter
Bread (we used honey wheat)

Directions:
1. Mix 1/3 cup BBQ sauce and 1/3 cup mayonnaise together in a bowl. Blend with whisk until smooth. It'll look a bit like chocolate - definitely deceiving!

2.  Take the stick of butter, peel back the wrapper and wipe it across a warmed pan several times, making sure to grease the entire pan surface. Lay down 2 slices of bread per person.
3. Slather a decent amount of the barbecue/mayo mix on each slice.
4. Pile 1/4 pound of barbecue on 1 slice and another 1/4 pound of barbecue on another slice. 
5. Add a mixture of cheddar cheese and Romano cheese on the 2 remaining slices.
6. Pop pan into a 450 degree oven for 7-10 minutes, until cheese is melted and the corners of the bread are golden brown.
7. Pile coleslaw on top of the barbecue meat.
8. Put the sandwiches together. 
9. ENJOY! We served ours with sides of fresh watermelon, baked beans, and potato salad! YUM! 

Sunday, September 6, 2015

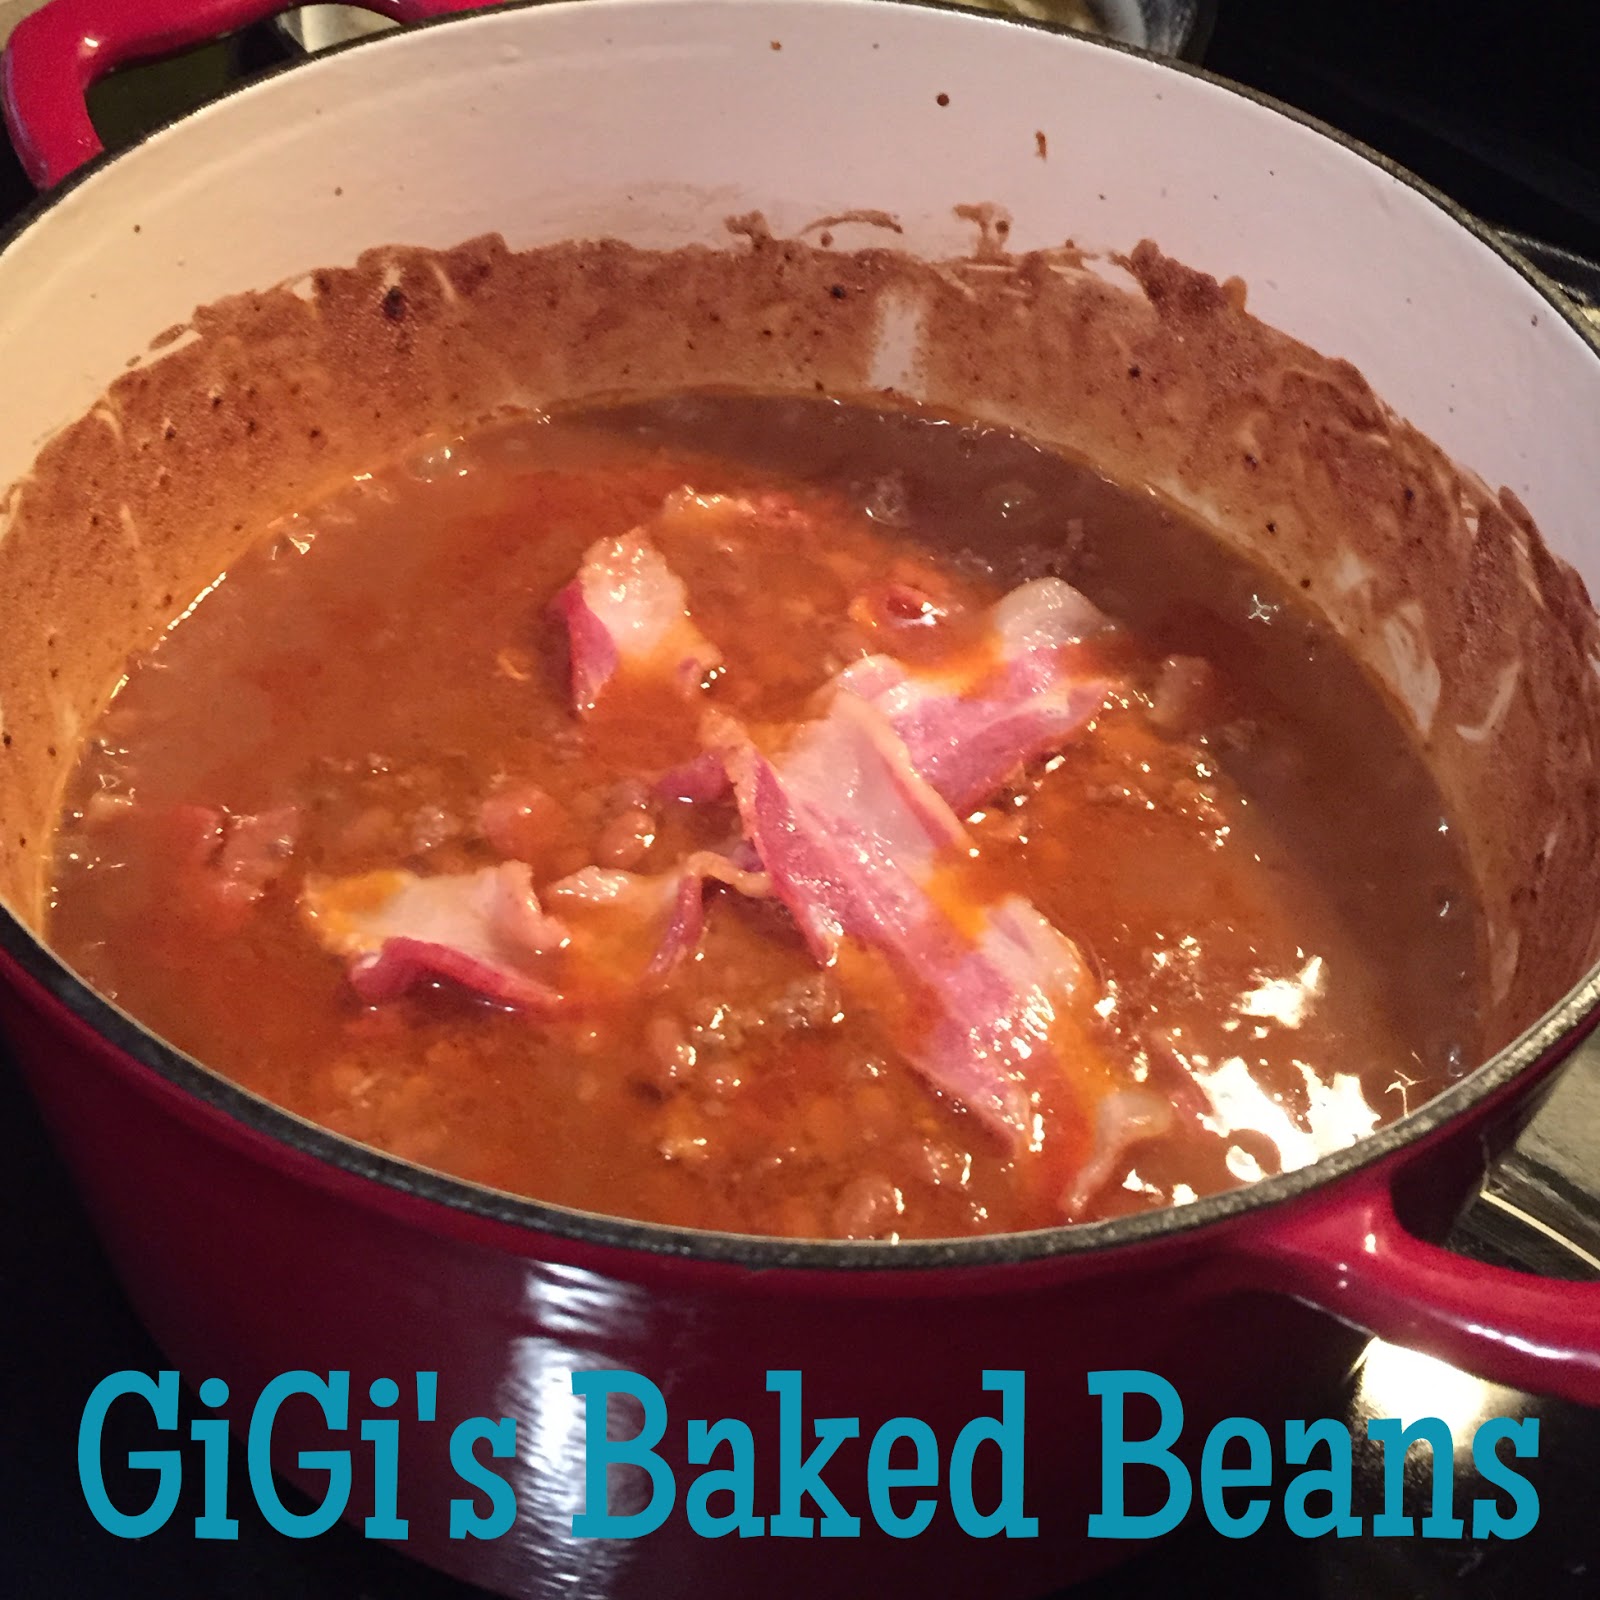
GiGi's Baked Beans

There's nothing quite as comforting as family recipes. It takes me back to my childhood, fills my belly, and warms and comforts my soul. J loves to cook family recipes. He apparently likes the pressure of trying to measure up to my mom's (grandma's, Mimi's, or aunts') cooking. I'm not complaining. It means that I get all the comforts of my childhood home in my own home. My mom's baked beans recipe are definitely a go-to recipe anytime we have to take a side dish to a potluck or need a quick, easy side for dinner (like a Labor Day BBQ!). We have put our own (very slight) twist on the recipe to make it a bit more hearty, but there's still nothing like the original. T calls my mom "GiGi," so we have renamed this recipe "GiGi's baked beans" at my house. These also heat up nicely on a cold day and make an amazing hand/heart/soul/belly warming dish!

What You'll Need:
1 Tbsp Butter
1 clove garlic, minced
1/2 pound ground beef
3 Tbsp Ketchup
1 tsp Mustard
1 Tbsp brown sugar
2 tsp Worcestershire sauce
Hot sauce (just a few dashes)
2 pounds of beans (fresh, homemade or canned is fine, as well!)
4 strips of bacon

Instructions:
1. Preheat oven to 450 degrees.
2. In a Dutch Oven, melt one Tbsp of butter over medium low heat and allow the minced garlic to simmer in the butter for a few minutes.
3. Add ground beef and cook until browned.
4. Once beef is browned, add the remaining liquid ingredients and stir together.
5. Take 2 of the strips of bacon and cut into 1/4 inch wide slices. Stir into bean mixture.
6. Top with the 2 remaining slices of bacon. Place lid on Dutch Oven and cook for 25-30 minutes. If you don't have a Dutch Oven, a regular 3 qt. baking dish will work!

7. Allow to cool for 10 minutes, serve, and enjoy!

I hope you enjoy my mom's baked beans as much as we do! Take it to the next potluck you're invited to. I promise you, they'll be a crowd pleaser!

Frying Up Happiness

Ok, as we have established, I am from the South (yes, with a capital S).  Eating fried items is in my
blood, along with sweet tea, rocking chairs on the front porch, and moonshine.  Of course, it has to be done RIGHT - which means, homemade! This Labor Day weekend, T and I were starving. J was not in the mood to cook just yet as he was seasoning his cast iron skillets. Being the kind man he is, he took a brief pause and made us some fried pickles with spicy fry sauce. T and I both love pickles, so J made 2 very happy (much less hungry) campers.

Fried Pickles:
1. Drain 1 jar of pickles (or more - I generally use 1 jar of pickles chips per 3 people), and lay the chips out in a single layer on some paper towels. Using another paper towel, pat the chips fairly dry.
2. Sift 1/2 cup flour, 2 tsp cajun seasoning, 1 tsp Italian seasoning, 1/4 tsp Cayenne pepper into a bowl. This mixture will accomodate 1.5-2 jars of pickles
3. Preheat vegetable oil in a skillet to 375 degrees.
4. In small batches (12-15 pickles), dredge the pickles in the flour mixture and drop them in the hot oil. Allow them to cook for 2 minutes, or until golden brown.
5. Scoop pickles out of the oil and place on a paper towel covered plate to drain the excess oil off.
6. Allow the oil to return to 375 degrees and then repeat the process.

Spicy Fry Sauce (adapted from The Pioneer Woman's Fry Sauce Recipe)
1/2 Cup Ketchup
1/2 Cup Mayo
Hot sauce to taste (We start with 1 tsp and add in 1 tsp increments)
Pinch (or 2 or 3) of black pepper.

**For an awesome spread for BBQ sandwiches, substitute BBQ sauce for Ketchup.

Alternative Spicy Dipping Sauce:
1/2 Cup Texas Pete Buffalo Sauce
1/2 Cup Blue Cheese Dressing
Salt & Pepper to taste.

Sunday, October 5, 2014

My New Favorite iPad App

I love to cook - when I have time. While most of you know from previous blog posts that J does the majority of the cooking, that doesn't mean that I don't enjoy scavenging for some amazing-sounding recipes! We really do enjoy cooking together (remember our second date?). Recently, my mom introduced me to this amazing iPad app for the kitchen: RecipeBook. When she initially purchased it, the app cost $2.99. Now it's $3.99. I don't generally make a habit of buying iPad apps. I personally think that it is a waste of money, but I did purchase this app. I am so happy that I did! Whenever I find a recipe that sounds great, I transfer it into this app. From there, I can email it to J (who has the same app). He can then transfer it into the app on his iPad and use it to make dinner! Super simple!

So, to demonstrate, I've included a little mini tutorial to show you a little bit of what this app is all about! I found this amazing-sounding recipe on Pinterest: Roasted Cauliflower & Gruyere Soup. I opened up the actual webpage that this recipe was found on and copied the link.

I then opened up my RecipeBook app and selected "Import Recipe from Online" under the menu options.

From there, you can import the recipe in a snap! The directions on the app are actually really well-written and easy to understand. The best part is, the app will create a grocery list on demand! Pretty awesome, huh?!

I hope you enjoy this app! Let me know if you want to swap some recipes! :)

Thursday, September 18, 2014

5 Amazing Fall Soup Recipes

If there's one thing I love about fall, it's the cooler weather. Cooler weather means boots, leggings, hot chocolate, fires in the fire place, soups, and snuggling - just to name a few things I love about fall. If you're looking for some ideas for you and your significant other (and/or family!), wander on over to my post "5 Things To Do During the Fall" and see what else I love about fall! One of my favorite parts about fall is the fact that it is no longer "too hot" for soup. I love soup. It's so comforting and warm. Soups are truly my comfort foods. (yes, you read that right - other comfort foods include macaroni and cheese, buffalo chicken dip, and cookie cake with LOTS of icing). Back to the soups. In the spirit of my little blog miniseries "The 5's of Fall," I've included my top 5 favorite soups (with recipes!) for you to peruse, possibly make, and enjoy! I can't promise that they are all low-calorie or super healthy, but they are super yummy!
Original Recipe from The Pioneer Woman

1. Broccoli Cheese Soup (With Ham!) 
4 heads broccoli, cut into 1-inch florets
Olive oil
Salt, Freshly Ground Black Pepper
1 stick unsalted butter
1 whole onion, diced (we substituted 3 cloves of garlic due to onion allergies)
1 1/3 cups all-purpose flour (I use gluten-free flour)
4 cups whole milk (we used 2%)
2 cups half-and-half
Nutmeg (just a pinch)
1/2 pound of ham (optional), cubed into 1/2 inch pieces
3 cups grated cheese (we used sharp cheddar)
1 cup chicken broth (optional)

1. Preheat oven to 375 F. Take the broccoli florets, cut in half, and drizzle with olive oil. Sprinkle with salt and pepper. Place the florets on a baking sheet with the cut-side down on the sheet. Bake for about 20 minutes or until the florets crisp and become slightly brown.
2. While the florets are cooking, melt the butter in a fairly large pot over medium heat. If you would like, add 1 whole onion, diced, and cook about 3-4 minutes until they are softened. If not, sprinkle flour on top of the butter and stir to combine. Cook until the flour is absorbed (about 1 minute). Add the milk and half-and-half. Add a dash of nutmeg, then the broccoli florets, a small dash of salt, plenty of pepper, and the ham. Cover the pot, reduce heat to low, and simmer until broccoli is tender (about 20-30 minutes). Stir in the cheest. Allow it to melt completely.
3. Taste. Add salt and pepper to season to your taste. Using a hand blender, break up the broccoli until the soup is more of a puree consistency. If you have a food processor, you can use this instead. Make sure you break up the soup into 2 batches if you use to the food processor. If needed, pour a smidge of chicken broth in to thin the mixture out.
4. Serve, garnished with grated cheese.

2. Vegetable Beef Stew on Mashed Potatoes
1 Tbsp cooking oil
1 lb stew beef, cut into 1-inch cubes
1 cup red wine (that you are willing to sacrifice. We generally use Bordeaux, but the dryer the wine the better the flavor!)
Salt & Pepper
4 small potatoes, or 2 sweet potatoes (optional, particularly if serving on mashed potatoes)
1 cup green beans
4-6 small carrots (4 doesn't seem to be enough to me sometimes)
1 cup tomatoes

6 russet potatoes, peeled and cut into 1/2 inch cubes
Salt
8 cloves garlic, cut into quarters
1/2 c heavy cream

1. Heat pressure cooker, add oil and brown the meat slightly.
2. Place vegetables over the meat, and pour in 1 cup red wine.
3. Place pressure regulator on vent pipe and cook 10 minutes with pressure regulator rocking slowly.
4. While the soup is cooking, place the cubed potatoes in a large saucepan. Cover with cold water and salt. Bring to a boil over medium heat. Boil for 10-15 minutes, or until potatoes are easily pierced with a fork. Make sure you skim the starch foam off the top occasionally. Drain potatoes and place in a blender/food processor (or use a hand mixer!).
5. Return saucepan to stovetop, and place on low heat. Add garlic and heavy cream to saucepan. Heat until cream begins to simmer. then add to blender (or place potatoes in saucepan and use hand mixer). Blend until potatoes are totally smooth puree. Add skim milk, as necessary, to thin to taste.
6. Scoop one ladle-full of mashed potatoes into a large soup bowl. Using the bottom of the ladle, form a bowl-like shape out of the mashed potatoes by pressing a "crater" into the mashed potatoes.
7. Ladle a healthy serving of beef stew on top.
8. Enjoy!

3. Copycat Olive Garden Chicken and Gnocchi Soup

1 Cup chicken breasts cooked and diced (we just shredded a rotisserie chicken instead)
4 Tbsp butter
4 Tbsp flour
1 quart half-and-half
15 oz can chicken broth
2 garlic cloves, minced
1 cup carrots, finely shredded
1 cup fresh spinach, coarsely chopped
1 Tbsp extra virgin olive oil
1/2 tsp thyme
1/2 tsp parsley
Freshly grated parmesan cheese
1 lb. potato gnocchi (You can buy this, but we made our own. It's super simple, and recipes are ALL over the internet!)

1. In the bottom of a medium-to-large pot, saute the butter, garlic, and olive oil on medium heat. When the garlic becomes translucent, add in the flour a little at a time, creating a roux. Let this cook for about 1 minute. Then add in the half-and-half.
2. Cook gnocchi according to package directions (we just made our own right before starting step 1. Super easy. I have not heard good things about the store-bought gnocchi. What I have gathered is that you need to buy the gnocchi in the refrigerated section, not the dry gnocchi on the shelves).
3. Into the roux, dump the carrots and chicken pieces. Once the mixture thickens, add the chicken broth.
4. Once everything has thickened back up, add in the cooked gnocchi, spinach, and seasonings. Simmer on medium heat until the soup is heated through.

4. Chicken and Dumplings
1 Rotisserie chicken
32 oz. chicken broth
11 oz. can Cream of Chicken soup
1 can Pillsbury biscuits
1 cup flour
Salt & Pepper

1. Shred the meat off the rotisserie chicken. (This is J's job. I hate getting my hands dirty.)
2. In a large pot, bring the chicken broth to a boil.
3. Pour in the cream of chicken soup and shredded chicken pieces. Stir well. Splash in salt and pepper to taste.
4. While this is heating through, taking the biscuits and pull them apart, making sure to separate the top of the biscuit from the bottom. You should have 2 thinner sections for each biscuit. Cut each piece into quarters. Dip the pieces into the flour. Place the biscuit pieces gently on top of the soup.
5. Gently poke the bread down, randomly, while cooking for about 10 minutes. Don't stir too much or the dumplings will break apart. Once the dumplings are cooked, you're done!
6. Serve. Enjoy!

**Side note, we sometimes add peas and carrots so it's like a chicken pot pie soup! Amazing! :)

5. Brunswick Stew
1.5 pounds of BBQ pork from your local BBQ place
1 Cup BBQ Sauce
2-16 oz cans tomatoes
1 can cream of corn
1 can reg whole kernel corn
1 Tbsp sugar

1. Squish up tomates with clean hands and break up the BBQ really well.
2. With clean hands, mix up all the parts with some TLC.
3. Place in crockpot and cook overnight (or all day) on low.
4. Enjoy!

Saturday, August 23, 2014

Making Your Left-Overs Go Further: Chicken Quesadillas

Remember the Crockpot Salsa Chicken we made in May? Well, we made it again recently. I had forgotten exactly how much of this stuff it makes! We had it for dinner 2 nights in a row with a TON still left over! We are getting ready to go on a trip soon, and I hate to let such a good recipe go to waste. So what is a girl to do? Well, enter my amazing fiance, J and his ability to whip up anything at a moment's notice. Little T has become obsessed with all things Mexican food, hence the salsa chicken. So, enter J's quick thinking: salsa chicken quesadillas. It's a super easy, quick meal to make and when there's a starving 4 year old screaming at your feet, it's quite the answer!

Salsa Chicken Quesadillas:

1 bag soft taco shells or tortillas
Butter (I would use a half a stick)
Left over salsa chicken
Mexican Blend Shredded Cheese
Guacamole (my recent obsession is with Yucatan Organic Guacamole - amazing. Got it at Sam's).
Shredded Lettuce, Tomatoes (Optional)

1. On medium heat, start warming a cast-iron skillet.
2. Rub the entire skillet down with butter once warm. J generally just takes the stick and rubs it directly on the pan.
3. Lightly brown the soft taco/tortilla on both sides.
4. Add lots of cheese on one side and let melt (J puts enough on that it squishes out the sides when he folds it together).
5. While the cheese is melting, pop some salsa chicken into the microwave to warm (generally 20-30 seconds, but will depend on amount of chicken you are reheating).
6. Once the cheese has melted, place salsa chicken on one-half of the tortilla. Fold tortilla in half.
7. Brown evenly on both sides so that the tortilla is a golden brown color (ok to have darker brown spots).
8. Open briefly and add lettuce and tomato (optional).
9. Cut into thirds or halves (whatever you desire) and serve with a dollop of guacamole.
10. ENJOY!

Saturday, August 9, 2014

Putting Your Erin Condren Life Planner to Work: Meal Planning

We have this issue in our house - a lot. It's 6 pm, J and I are both starving, and yet we have no food thawed out, the left overs are bad, and no plan for dinner. So we make it work by going out to eat - a huge killer for our already tight budget. We have implemented a system at our house to make grocery shopping easier, decrease the meals we eat out, and make the most out of the food we do buy. If you take your lunch to work, you can even take this a step further by figuring out how you are going to dole your leftovers out over the week for lunch.

1. I have taken this idea from a sweet girl I know from a Facebook group for Erin Condren fanatics. I created a page of quick meal ideas (my "meal reference") that I refer to when I get stuck.  I have organized these by categories: main dishes, crockpot recipes, sides, and recipes to try (for when I stumble across that amazing-sounding recipe on Pinterest and want to actually remember which dish I pinned).  If you have a picky kid, make a list separate for them and add to it when you find a new food he or she likes. The possibilities of your menu reference are endless! I even created on specifically for parties, dividing it up into the following categories: appetizers, sides, salads, finger foods, dips, and main dishes.
2. Using my cravings (no I'm not pregnant), J's requests, and my Pinterest inspirations, I create a list of meals - one for each day. I run this list by J to make sure that he is ok with everything (after all, he is the cook!). I write this down on a sticky note (and try to assign one meal to each day of the week, mixing up the protein of the main dish so we don't have chicken 3 nights in a row, etc.).

3. Once I get to the point where I am ready to decorate my week (see how I do that here!), I write down each meal on a sticker and stick it at the bottom of the page on the lined notes section.

4. I then transfer the meal plan to our menu board on the fridge. I ordered this off of a discount website (jane.com).  The original company was Lovey Dovey Creations. This way, if I am at work with my planner, J knows what to thaw out, cook, prepare, etc.. We often use the left overs for lunch the next day if we can. Sometimes, we simply plan to make less of a meal if we are trying to cut down on the amount of leftovers we have (like if we are leaving for a trip later that week).

I hope this has inspired you to get to meal-planning! I plan weekly so we make weekly trips to the grocery store. However, I have made monthly meal plans before (it just got a bit tedious for me). The great thing about this system is you can use all (or none, or some) of what I do. Let me know how it works for you!

Friday, August 1, 2014

5 Crockpot Recipes You Can't Live Without

Summer is winding down, and school supplies are lining the shelves at the local stores. It's about to become the busiest time of year: school, after-school activities, sports, more traffic... You get it. Life is about to get busier while the days get shorter (literally, but I love my extra hour of sleep when we "fall back" an hour!). How on earth are you supposed to get all this done and put dinner on the table in a timely fashion?! Enter, my best friend during the season of winter: the crockpot.  Crockpot recipes often contain "cream of something" soup. Not ideal, and certainly not healthy. I have made an effort to try and cut back on the amount of processed foods in our diet. I can't say that I've been 100% successful (particularly in the crock pot arena), but I certainly have made headway in cutting back! (Pats self on back). Generally I do this by avoiding crockpot recipes, but I do have a few I keep in my regular repertoire. What I've done is compile a list of my absolute favorite crockpot recipes that stay in my regular dinner rotation (complete with ingredients and directions).

1. Slow Cooker Loaded Potato Soup (**Disclaimer: this isn't healthy, but it's AMAZING!)
5 pounds Russet potatoes, washed but not peeled. Diced into 1/2 inch cubes
10 cloves of garlic, minced (If you use jarred, it's 5 teaspoons)
64 ounces (8 cups) chicken stock or broth
16 oz cream cheese, softened (we chose low-fat)
4-5 strips of bacon, cooked and chopped
Cheese!
Optional: Ham, cubed

1. Add potatoes, garlic, and chicken stock to slow cooker. (You can add 1 tablespoon salt. I just leave it off and allow people to salt their own soup - everyone has different tastes/preferences)
2. Cook on high for 6 hours or low for 10 hours.
3. Add softened cream cheese and puree into potatoes with an immersion blender until the cream cheese is well incorporated and about half the soup is blended. There should be a creamy appearance, with some small chunks of potatoes throughout.
4. **Optional step. Add ham and stir well. Cook for another 10-15 minutes.
5. Top with cheese, bacon, chives, etc. Enjoy!

2. Weight Watchers Slow Cooker Potato & Bacon Chowder (4 Weight Watchers Points!)
Original Photo courtesy of Pinterest
2 cups potatoes, cut into small cubes
4 oz. Canadian-style bacon, cut into 1/4-inch pieces
1 large carrot, diced
3 medium garlic cloves, minced (jarred garlic, use 1/2 teaspoon)
4 cups fat-free chicken broth
1/2 uncooked barley
1 bay leaf
1/4 tsp dried thyme, crushed
1/4 tsp black pepper
1 cup fat-free half and half

1. In slow cooker, combine potatoes, carrots, garlic, broth, barley, bay leaf, thyme, pepper, and bacon. Cover & cook on low for 4-6 hours.
2. Stir in half-and-half. Heat through, uncovered, stirring occasionally, about 10 minutes.

3. Slow Cooker Chicken & Dumplings
2 large boneless, skinless chicken breasts, each cut in half
Salt & Black pepper
1 teaspoon garlic powder
Pinch of dried thyme (optional)
4 chicken bouillon cubes
1 can cream of chicken soup
Water
1 can Grands biscuits (8 ct.)

1. Add the cream of chicken soup to the slow cooker. Pour in 4 cans worth of water.  Drop in the
Original Photo Courtesy of Pinterest
bouillon cubes and add the garlic powder and thyme. Using a fork or a small whisk, mix everything together in the slow cooker.
2. Season chicken with salt and pepper, and drop in to the slow cooker.
3. Cook on low for 5-6 hours.  Then break up the chicken a bit. I generally just do this right in the slow cooker. We like to shred the chicken so it's in fairly small, thin pieces.
4. Cut each biscuit in to 8-10 pieces. You can use scissors or a knife for this step. Add the pieces into the slow cooker.  Stir in, making sure that you cover all sides of each biscuit piece with the liquid mixture.
5. Cover, and cook for 2 more hours. Check on the soup every so often, just to ensure that the biscuit pieces don't stick to the inside of the crockpot or brown on the top too much. Just press the biscuits down, don't stir the mixture.
6. Give the mixture a good stir just prior to serving.

4. Slow Cooker Salsa Chicken

4 boneless, skinless chicken breasts
1 cup salsa (I used mild simply because T hates anything super hot. This is where you can have some fun!)
1 can condensed cream of chicken soup (my least favorite thing about this recipe, but hey - at least it's only one can!
1 packet taco seasoning
1/2 cup sour cream
6 tortillas (J & T like the extra fluffy, and I'm all over here like "I'll have a corn one, please.")

1. Place the chicken in the bottom of the crock pot (The beauty of this - we dumped in the chicken still completely frozen). 
2. Sprinkle taco seasoning on chicken breasts. 
3. In a separate bowl, combine soup and salsa.  Pour over chicken.  
4. Cook on high for 4 hours.  
5. Shred chicken (I use the 2 fork method) and stir in sour cream. Serve on tortillas.

5. Beef Stroganoff  
1-2 lbs cube steak, cut into one-inch strips
2 cans condensed golden mushroom soup
1 Tbsp Worcestershire sauce
1-14 oz can beef broth
8 oz. mushrooms, cleaned and diced
4 ounces cream cheese, warmed to room temperature
1/2 cup sour cream

1. In the crockpot, combine the meat, soup, Worcerstershire sauce, broth, and mushrooms. Cook on low 5-6 hours.
2. Stir in cream cheese and sour cream, about 1/2 hour before serving. Make sure to stir the mixture every ten minutes to break up the cream cheese.
3. Cook egg noodles according to package directions. Stir in to the crockpot mixture for approximately a half hour.
4. Add cornstarch and/or water to change the thickness of the sauce to your liking.
5. Serve (I generally prefer bowls and large soup spoons!) and enjoy!

Friday, July 18, 2014

Steak Salad

I absolutely love a good salad. And there is certainly nothing better than a good, well-seasoned steak. Why not combine the two into one, glorious meal? To me, it's perfect for summer. You get your protein with the steak without feeling like you had an enormous, heavy meal. It's super simple to make, and really only requires a little bit of your time to make. Been wanting to check out that local farmer's market of yours?! Here's your excuse! Drive on over there and get yourself some fresh veggies for your salad. And of course, if you know anything about me by now, you know that I love a meal that you can tailor to your own tastes.

Ingredients:
Fresh veggies for your salad
1 top Sirloin, marinated if you would like (for 24+ hours)
Shredded Cheese
Salad Dressing

Directions:
1. Take your freshly marinated steak and toss that puppy on the grill! OR - slather on your favorite meat rub before you grill it instead of marinating!
2. While the steak is grilling, start working on your salad. Make sure you periodically check on the steak! You don't want a blackened steak salad! ;)
3. Once the steak is done, slice into thin strips or cube it. Add desired amount onto salad.
4. Top with some shredded cheese and your favorite salad dressing.
5. Enjoy!


Wednesday, July 16, 2014

Shrimp & Grits

Let's be honest. I'm Southern - yes, with a capital S. I was born and raised in Georgia. I have sweet tea coursing through my veins. And I can smile while silently looking down my nose at you with a "Bless your heart." So to say that shrimp and grits is a favorite meal of mine is an understatement! J treats me to a meal of shrimp and grits at least once per month, and more often if it's summertime and the shrimp is fresh!!!

Shrimp and grits is an easy, flexible dish. Have 2 for dinner? No problem. 8 people? Still a cinch! It is easy to make an amount specific to the number of mouths you are feeding. The best part?! It takes no more than 20 minutes to make this amazingly satisfying dish! It's also very popular, particularly here in the South! Recipes abound! Just check out Pinterest. But J makes an amazing, slightly hot (spicy hot) version that is to die for! So how do YOU get your paws on such a Southern tradition?! Look no further! J has given me access to his secrets.

Ingredients:
Shrimp (I generally guesstimate about 6 shrimp per person)
Grits (Don't frown at us - we use Instant Grits)
2 Tbsp Butter
1/4 tsp Garlic
Dash Hot Sauce
1/4 tsp Tony's Cajun Seasoning
Shredded Monterrey Jack cheese

Directions:
1. Melt butter in saucepan (large enough to hold all your shrimp) on medium heat. You may need to use a bit more butter for larger amounts of shrimp. Keep in mind we cook for 2.)
2. Add in garlic and Tony's seasoning, as well as a dash (or 5 if you are J) of hot sauce.
3. Once the butter and seasoning mix starts to sizzle a bit, toss in your shrimp! Cook until those puppies are pink! Stir occasionally.
4. While the shrimp are cooking (and sizzling - I love that sound!), start cooking your grits. We just follow the stove-top directions on the Instant Grits box (do not get the individual packets, get the huge box that'll last you a while). This is a bit more time consuming, and requires just a *bit* of babysitting, but I can attest that it is worth it.
5. Once the grits have reached the desired consistency, get a bag of shredded Monterrey Jack cheese. Add by the handful, stirring as you add cheese. Add as little or as much as you would like.

To Serve:
Once everything has finished cooking, I recommend you serve this in a bowl! Get your bowls out and plate as such:
1. Spoon (with a ladle - don't skimp!) the desired amount of grits into each bowl. We generally do 1.5-2 ladle-fulls per person.
2. Spoon 5-6 shrimp per person on top of the grits, making sure to get some of the spicy goodness still left in the pan drizzled on top of the shrimp.
3. Enjoy - carefully! This dish will be piping hot, so go slow (and don't burn yourself!).

Make a few extra, and you have a topper for your salad for lunch tomorrow! Yum! :)

Tuesday, June 24, 2014

Marinated Chicken

J and I have recently fallen in love with a new Lawry's marinade: Herb and Garlic.  It's amazing, to put it quite simply. If you want to plan ahead, take a gallon size freezer plastic bag, toss your chicken breasts, thighs, etc. in and drown it in marinade! If you are scrambling to get something put together for dinner, then just slather the marinade on the chicken as you grill it! Totally just as delicious! Can you tell by now that I love items and recipes that provide options?!

J and I prefer to marinate the chicken overnight at minimum, sometimes even marinating the chicken for 48 hours (even better for those of you that plan way ahead!). So, here's how we do it.  Thaw out one pack of chicken breasts (3-4 breasts), thighs, etc. Once thawed out, go ahead and toss the chicken into a plastic bag.  I use a gallon-sized freezer bag.  Drown it in the marinade. I mark the time that I put everything in the bag so that the chicken can marinate for at least 22-24 hours. Pop it in the fridge for the night/following day (or 2 days as we do sometimes!). Make sure to lay it flat on the fridge shelf so that the chicken is not getting marinated unevenly! If you remember, flip over the following morning to make sure that every part of the chicken gets equal cover time!
Once the chicken has marinated for long enough, we grill it (best way to cook it, in my opinion). J loves to grill so that there is a bit of char on the meat. At first, I was a little turned off by it because I thought he was intentionally burning the meat.  Then I realized, he's just adding a little extra crisp and flavor, and I came to love it.  I mean, how good does this look?:
The best part of this marinade is that the chicken will go with essentially anything.  We ate it with spinach ravioli and marinara sauce (Check it out here!) a few weeks ago.  Tonight, we experimented and ate it with coleslaw - a summer staple for us. It was equally as amazing! Of course, I ate my signature dessert as a side, but who's keep track right?! ;)
Want to spice this recipe up? Why not toss some shrimp into the marinade bag, as well?! Quarter some red potatoes, sprinkle with parmesan cheese and rosemary and bake at 350 for 15-20 minutes (Depends on how crispy you like your taters!). Now that's a meal!

Tuesday, June 17, 2014

Thai Curry Anything

J and I made this together when we first started dating.  It was actually the first thing we made together (Cue chorus of Awwwws). We probably make this every other week because it is SO good and so full of color (natural color!).  I absolutely hate zucchini, but I will eat it in this recipe! J originally got the recipe when he was in grad school. The best part is, you can use any source of protein (think: chickpeas, tofu, etc.) and any veggies you want! The options are endless. You can literally throw in anything (Hence, us calling it "Thai Curry Anything.") I hope you enjoy it as much as we do!

Ingredients:
1 pound of smoked sausage, cut into thin slices
3-4 cups of chopped veggies (we do 1.5 cups of red/yellow peppers, and 1.5 cups of zucchini, all diced)
1 can coconut milk (not refrigerated - you can find cans or cartons at your local supermarket!)
1 Tbsp of cooking oil
Curry Paste (we use green or yellow as it's less spicy)

Directions:
1. In large pan on medium high heat, add one tablespoon of cooking oil.
2. Add sausage and stir fry for a minute or two.
3. Add in vegetables and cook for a minute or two.
4. Add curry paste, stir and cook for another minute.
5. Shake coconut milk well before opening, then add to veggies, meat and curry.
6. Add a half of cup of water or so and stir well to distribute curry paste evenly.
7. Simmer for a few minutes heated through (or until meat is thoroughly cooked).
8. Serve with cooked rice!

Enjoy! How delicious does THIS look?!

Sunday, June 1, 2014

The Evolution of Buffalo Chicken Pizza

The "Original" (taken from http://allrecipes.com/Cook/
grumpys_honeybunch/Photo.aspx?photoID=419038)  
I found this recipe on Pinterest when J and I started dating about 2 years ago.  It was actually the second recipe that we cooked together (Cue chorus of "Awwwww"s).  Our first meal we made together was curry, which I am hoping to share the recipe soon as it has become a staple in our household! Moving on...I found the original recipe for Buffalo Chicken Pizza on Pinterest and felt like I HAD to make it.  I mean, I am a connoisseur of Buffalo Chicken Dip (well, all things Buffalo chicken for that matter).  I may not like the "tongue torch" heat (I actually lean more towards the mild side - don't hate), but I do like a slight kick with mine! This pizza recipe provides the perfect blend of pizza and buffalo chicken!

I must admit we started eating this on a rather regular basis - probably once, if not twice, a month. So we decided to have a little fun with it. Certain things I'm a stickler for the "original is best" or "oldie but goodie."  Not this! And I am SO glad I haven't followed my usual mindset.  First, we threw on a little bit of chopped bacon (No - not bacon bits. Don't cheat!).  That was a HUGE step towards perfection with this recipe (not that it wasn't already stellar!).  Our next step was (after we went gluten free) buffalo chicken pizza with bacon and extra blue cheese crumbles (I believe we used ranch dressing as the base this time, rather than blue cheese) on a gluten free pizza crust (Pilsbury actually makes a decent one!).  How delicious does this look?
Courtesy of my Instagram!
Recently, our newest addition was diced tomatoes.  SO - we had "Gluten Free Buffalo Chicken Pizza with chopped bacon and diced tomatoes."  It gets even better - can you believe it?! While eating this:
Mouth-watering twist on a classic Buffalo
Chicken Pizza!
we were discussing further updates or modifications we could make to the recipe: chopped mushrooms, diced celery...the possibilities are endless! I love recipes like this - where you can add so many different things, and it has such good roots that it continues to be amazing!  So while you ponder what YOU would add to YOUR Buffalo Chicken Pizza, I will leave you with a few mouth-watering, thought-provoking images!  I really encourage you to give it a shot! It is definitely a crowd-pleaser, and will certainly lead to you making it often! 

Did you try it? What did YOU think?! Leave a comment below! :)

Thursday, May 29, 2014

Throw Something Together

My "thrown together" meal: made on the fly
with convenience in mind, and turned out
DELICIOUS! Bon appétit!
You know those nights when nothing you have on your menu plan sounds appealing? Or when you have several things that you need to get out of your fridge or freezer? What to do when confronted with this dilemma?! Combine them and make them one amazing dinner, of course!  Obviously, this doesn't work for everything.  However, we were lucky enough the other evening that this combination did work together - and amazingly so! You know those nights that you had something planned for dinner but ended up meeting friends for dinner that night instead? Yeah...we had a few of those nights recently.  We had a meal planned for Monday night, but went to my parents' home for dinner instead.  Naturally, dinner for Tuesday was already planned, as well...what to do now?! Because Italian-marinaded grilled chicken sounds great...but so does organic spinach and cheese ravioli with homemade marinara sauce!

Remember making marinara sauce with me in one of my original blog posts? No? I'll pause while you check it out.  It's amazing, if I do say so myself!  Remember when I bought the spinach ravioli at Sam's? I highly suggest you run out and buy some if you live near one, too!  We originally planned to make spinach ravioli with marinara sauce for dinner one night, but ended up eating at my parent's that evening instead, so we postponed this particular meal. We had dropped chicken thighs into a plastic bag and drenched them with Italian dressing (easiest, best, and fairly low fat marinade!), allowing them to marinate about 48 hours before in preparation for grilling some marinated chicken thighs.

Now what's a girl to do? Because both those sounded amazing to me! Well, we just combined them into one fabulous dinner!  We boiled the ravioli up, and we thawed out some of the frozen marinara sauce in a small pot on top of the stove.  Meanwhile, J went outside and dropped the marinated chicken onto the grill.  We put one thigh in a bowl, accompanied with 4 ravioli (which were topped with the marinara sauce).  Dinner, completely ready, in less than a half hour!

I mean, doesn't this look amazing?!
On your left, you will see Spinach ravioli with
marinara sauce. On your right - grilled chicken
marinated in Italian dressing! Can you say Yum?!

Thursday, May 15, 2014

A "Pinteresting" Life: Tilapia Fish Tacos

We made a trip to Sam's last weekend to stock up on seafood.  I love seafood.  It's a problem.  Actually, it'd be a problem if I was allergic to seafood - tragic, even! I would probably eat it and just have an epi pen handy (terrible, I know)...We found some amazing-looking tilapia and so I grabbed some (in addition to some gorgeous salmon and darling little shrimp - see?! I do have a problem...I describe seafood as gorgeous and darling...).

Of course, I raided my Pinterest account looking for some new ways to cook up said seafood.  We decided to throw in some tilapia into our weekly meal plan, and incorporate it in a way that Little Man would like, which limits us to: mexican-style food and something with the word "nugget" in it.  Tilapia nuggets didn't sound all that delicious, so I searched for some fish taco recipes.  Boy did I hit the jackpot! I found this recipe on Right @ Home. We tweaked some things a bit, as we knew that certain items/ingredients wouldn't be appreciated by the finer palettes that reside in the house...The tacos are supposed to be served with strawberry-tomato salsa, but to me regular salsa is a perfectly good "taco topping," so why switch it up? Especially with a picky 3 year old on board?

I must admit, I wasn't thrilled about the idea of chowing down on fish tacos tonight.  It just wasn't appealing to my inner diva at the moment. I am most certainly glad that J ignored my childish diva moment and proceeded with the menu as planned.  These were BY FAR some of the best tacos I've ever had, let alone one of the best meals I've had in a while!

Little Man chowing down on taco #2!
We didn't tell Little Man what exactly we were eating at first. He dove right in and promptly chowed down on his first fish taco, then proceeded to ask for a SECOND! When we asked him if he liked the Tilapia (Or the Till-a-peel-a, as he says it), he nodded vigorously! VICTORY! He dipped his second taco into some regular salsa, while J and I enjoyed ours with avocado slices, cole slaw, lime juice, and some cilantro (Yum!).  The recipe was rather simple to make when there's someone to keep the 3 year old from clinging to your leg!

Below is OUR version of the recipe.  For the original version (including the strawberry-tomato salsa recipe) see the link above, included earlier in the blog!

Ingredients:
4 tilapia filets, approximately ¼ pound each
1 teaspoon of your favorite taco seasoning
1 tablespoon extra virgin olive oil
8 6-8-inch flour or corn tortillas, heated according to the package directions
1 avocado, sliced
1 cup shredded lettuce or green cabbage
1 lime, cut into small wedges

Directions:
1. Prepare coleslaw. Set in fridge to chill.
2. Dry the filets with a paper towel.  Sprinkle with taco seasoning and set on a plate.  Heat a non-stick skillet over medium-high heat.  Pour in olive oil.  when the oil is hot, gently add the fish to the pan, cooking for approximately 5 minutes and turning once.
3. Remove fish from the pan and break each filet into 2 pieces. Serve in tortilla, topped with coleslaw and avocado slices. Drizzle lime juice and sprinkle cilantro on top!

I hope you and your family enjoy this as much as ours did! This was a great recipe and didn't taste extremely and/or overwhelmingly "fishy." Give it a try, and let me know what you think! 

Wednesday, May 7, 2014

A "Pinterest"-ing Life: Asian Beef Lettuce Wraps

I am absolutely in LOVE with Asian foods: Thai food, Chinese food, Japanese food (Sushi, anyone?!), Korean food, Vietnamese food....you get the picture!  My stomach is just growling thinking about all the amazing different types of amazing Asian-style and Asian-inspired foods! I recently went on a Food Network kick and discovered Ree Drummond, the Pioneer Woman! Most of her recipes are delicious, even if they do contain some ingredients I'm not so thrilled about (Whipping cream, anyone?!).  BUT her recipes are wholesome, good ole' fashioned, down-home, delicious meals!  One of my favorite parts is that her recipes are simple, require few (if any) complicated ingredients, and taste amazing!

Recently, I have been struggling to find a delicious, inexpensive, gluten-free meal/recipe that I could make. I was actually browsing pinterest, while watching the Pioneer Woman on The Food Network.  I watched her make an amazing, simple meal of Asian Lettuce Wraps.  I was unable to write down the recipe fast enough, but I found what I believed was a VERY similar recipe on the  Food Network, by Sunny Anderson.  Fortunately for me, this recipe contains ingredients that I generally keep in stock in my pantry!  The only thing I had to purchase was the hoisin sauce (YAY for budget friendly!).
Source: http://www.foodnetwork.com/recipes/sunny-
anderson/asian-lettuce-wraps-recipe.html

The wraps ARE a bit spicy, but they are delicious! The coolness of the lettuce also helps to counteract the spiciness of the meat.  I will warn you: if you are gluten-intolerant, like I am, you may need to browse the Asian section (or sometimes the "gourmet" section) of your grocery store fairly carefully to find gluten-free soy sauce or gluten-free hoisin sauce.

Josh and I finished off the entire pan of meat in one sitting the first time we made this!  The other few times we made it, we saved some for lunch/dinner leftovers the next day.

Ingredients:
2 teaspoons vegetable oil
1 pound ground beef
2-inch piece ginger (we used ground)
2 cloves garlic,
2 tablespoons soy sauce
1 teaspoon red pepper flakes
1/4 cup hoisin sauce
1/4 cup chopped peanuts
1 head Boston lettuce, leaves separated, cleaned and dried (we sometimes use Romaine Lettuce)

Directions:
1. In skillet over medium-high heat, add the vegetable oil and saute beef until brown.
2. Stir in ginger, garlic, soy sauce, red pepper flakes, and hoisin sauce.  Cook for 1 minute.
3. Remove from heat and stir in peanuts.
4. Add salt and pepper to taste.
5. Serve warm, wrapped in lettuce!

Want a vegetarian option?? Check out the Pioneer Woman's vegetarian recipe with tofu HERE!